REVIEW · GLASGOW
Stirling Castle The Trossachs & Loch Lomond
Book on Viator →Operated by Glasgow Chauffeur Hire Ltd · Bookable on Viator
One day, three Scottish icons. This private Glasgow outing strings together Stirling Castle, the Trossachs countryside, and Loch Lomond views in a way that saves you a lot of planning. I especially like having a solid 1 hour 30 minutes for the castle, and I like finishing with a calm Loch Lomond moment at Luss Pier.
The main thing to consider is that admission for stops like Stirling Castle is not included, so you’ll want to budget for entry fees before you go. Also, a few stops are brief, so if you want to linger everywhere, you may feel a little tight on time.
In This Review
- Key highlights worth your attention
- Why this is a smart one-day Scotland plan
- Morning start: private pickup and a calmer pace
- Stirling Castle: 90 minutes to focus on the most iconic parts
- Callander Crags and Bracklinn Falls Bridge: quick countryside stops done right
- Balmaha Millennium Forest Path and The Oak lunch stop
- Kilmahog Woollen Mill: Scottish craft time, plus optional cow feeding
- Passing Aberfoyle, then heading for Loch Lomond at Luss Pier
- Price and logistics: what $888.29 per group really buys
- What to expect from the pacing (and how to make it work)
- Who this tour fits best
- Should you book Stirling Castle & the Trossachs to Loch Lomond?
- FAQ
- What time does the tour start?
- How long is the tour?
- Is pickup included?
- Are tickets included for Stirling Castle and the other stops?
- Is this tour private?
- Can I cancel for a full refund?
Key highlights worth your attention

- 90 minutes at Stirling Castle gives you time to see the big sights without rushing in and out
- Loch Lomond at Luss Pier includes a walk all the way along the pier for waterline views
- Callander Crags + Bracklinn Falls Bridge add a classic Trossachs feel between villages
- Balmaha Millennium Forest Path works well as a quick nature pause before lunch
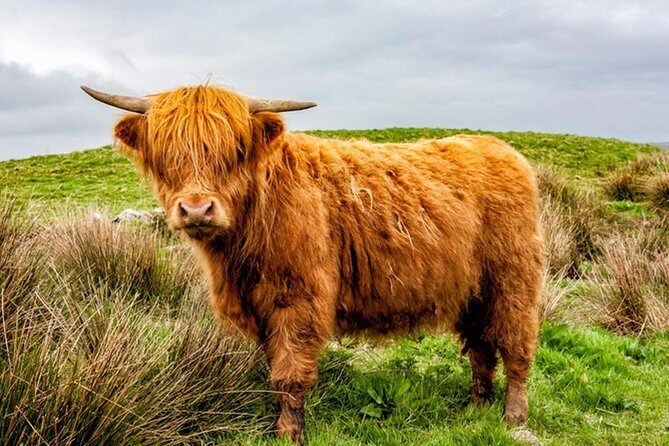
- Kilmahog Woollen Mill includes optional time to feed the highland hairy cows, Hamish and Honey
- Private group up to 6 means the day runs at your pace, not a coach-full schedule
Why this is a smart one-day Scotland plan
If you’re short on time in Scotland, this kind of day tour can feel like cheating—in a good way. You cover major hits in one run: Stirling Castle, a slice of the Trossachs, and then Loch Lomond at Luss.
What makes this route practical is the flow. You’re not bouncing around with complicated transfers or decoding local bus timetables. You get an organized day with a driver, plus short on/off breaks that let you see a lot without turning the whole day into a blur.
Other Loch Lomond and Trossachs tours we've reviewed in Glasgow


Morning start: private pickup and a calmer pace
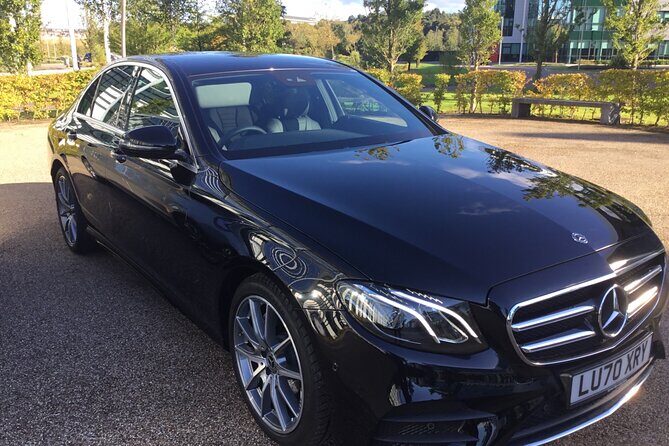
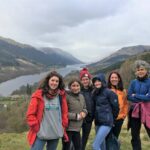
The day begins at 8:30 am, with pickup offered, and it’s set up as a private tour for your group only (up to 6 people). That matters. It means you can move as a unit, ask questions, and keep the schedule from feeling like a cattle chute.
You’ll also travel with a mobile ticket, and you get confirmation at the time of booking. And if you need it, service animals are allowed, with “most travelers can participate” as the general suitability note.
Because the duration is listed as 6 to 8 hours, you can plan your day on either side. It’s long enough to feel like a real excursion, but not so long that it swallows your entire trip.
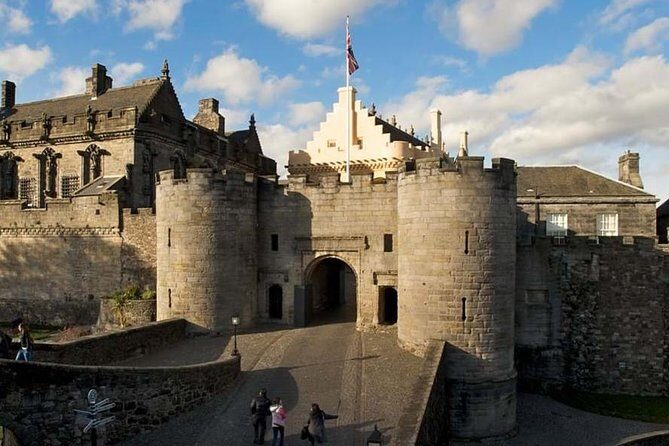
Stirling Castle: 90 minutes to focus on the most iconic parts
Your first stop is Stirling Castle, with about 1 hour 30 minutes on site. This is the one piece of the day that has breathing room, and it’s where I’d aim to spend your energy.
With that amount of time, you can do a proper walk around key areas rather than just snapping photos at the gates. It’s also a good moment to choose what you care about most—big views over the area, walking the grounds, and taking in the atmosphere of a place that’s been the backdrop for major Scottish moments.
One practical note: admission for Stirling Castle is not included. That’s not a dealbreaker, but it does change the total cost. If you know you’ll want to go inside, build those entry fees into your planning from the start.
Callander Crags and Bracklinn Falls Bridge: quick countryside stops done right
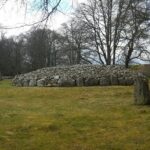
Next you’ll head to the Bracklinn Falls Bridge and Callander Crags area, plus a visit to the village of Callander. This part of the day is shorter—about 30 minutes—so the goal is not to “do everything.” It’s more about getting the feel of the Trossachs between the bigger stops.
The time makes sense if you want variety. You get a classic Scotland feel—bridge and falls area energy—then a village break at Callander, which is handy for resetting your legs and grabbing a snack if you need one before lunch.
Since entrance fees aren’t listed for these stops, your main cost here is time and attention. Use it to take photos, stretch, and notice the pace of the countryside compared with the castle stop.
Balmaha Millennium Forest Path and The Oak lunch stop
After Callander, you’ll stop at Balmaha Millennium Forest Path, with around 30 minutes. This is your nature pause, and it’s timed like a reset button: enough time to get out of the car, walk a bit, and feel like you’ve changed gears from historic sites.
Your schedule also includes lunch at The Oak during this stop. That’s useful because it removes guesswork. Instead of searching for somewhere to eat while everyone gets hangry, you have a built-in break right where you’re already stopping.
Because this segment is also about half an hour, I’d keep expectations realistic. Think of it as a short woodland walk plus a meal stop, not a long hike day. If you want longer trails, you can always add extra time elsewhere in your Scotland trip.
Other Stirling Castle tours we've reviewed in Glasgow


Kilmahog Woollen Mill: Scottish craft time, plus optional cow feeding

Then you’ll head to Kilmahog Woollen Mill, with about 15 minutes. Yes, that’s short. But short here can be good—especially if you like popping into places that show local life without stealing your whole afternoon.
This stop also includes a fun, very Scotland moment: Hamish and Honey, the highland hairy cows. Feeding them is listed as optional, and even in a quick stop, it tends to be the kind of memory you keep.
Here’s the balanced take: if you’re not interested in mills or animal moments, you may find 15 minutes tight. But if you enjoy simple, hands-on encounters—especially ones that make the countryside feel real—it’s an easy win.
Admission isn’t included here either, so if you want any special shop time or activities, keep entry fees in mind when you calculate your total.
Passing Aberfoyle, then heading for Loch Lomond at Luss Pier

You’ll also pass by the village of Aberfoyle during the drive. Since it’s described as passing rather than stopping, the value is mainly scenery and route flow, not a standalone visit.
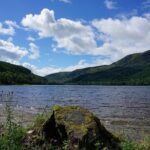
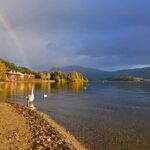
The big payoff comes at Luss Pier. You’ll have about 15 minutes to visit the village of Luss and walk along the pier out to the end, looking directly on to Loch Lomond. This is short, but it’s the right kind of short. Pier time rewards you quickly—stand, look, walk, and take in the water views before the day moves on.
If you get even slightly good weather, this is the moment that can make the whole day feel worth it. One visitor noted a sunny day at the castle and said he was able to sail on Loch Lomond—so the dream here is clear skies plus a lakeside atmosphere.
Again, admission isn’t listed for this stop. Your main input is time and how quickly you want to soak up the views.
Price and logistics: what $888.29 per group really buys
The price is $888.29 per group (up to 6). That’s not cheap at first glance, but private multi-stop days often cost this way because you’re paying for transportation, driver time, and coordination across several different places.
To put it into human terms: if you fill all 6 seats, the per-person cost drops a lot compared with going with fewer people. If you only have 2 or 3 in your group, the cost per person rises. So the value is highest when you can truly group up.
Also factor in what’s not included. Stirling Castle admission and other entry fees are not included, and the same applies across the various stops. That means the total you spend in practice will be more than the listed tour price once you add tickets.
On the planning side, this tour is booked in advance: on average 149 days ahead. If you’re traveling in peak season or want a specific day, waiting can be risky. I’d treat this as a “book early” style of experience.
What to expect from the pacing (and how to make it work)
A day like this works because the stops are timed for variety. You get one longer moment at Stirling Castle, then a chain of shorter stops that add scenery, villages, and quick nature/countryside changes.
Here’s how to keep it enjoyable:
- Prioritize comfort. If you hate rushing, wear shoes that let you walk fast without punishing your feet.
- Choose your “must-dos.” At Stirling, plan what you want to see inside since that’s the main longer stop.
- Treat the shorter stops like photo and stretch breaks, not full activities.
Because you’re on a schedule, you won’t have unlimited time for extra wandering. But you will have a well-paced overview of central Scotland’s highlights in one go.
Who this tour fits best
This is a great match for you if:
- you want maximum sighting time in one day from Glasgow
- you prefer a private setup with a group limited to 6
- you like mixing big attractions (Stirling) with countryside breaks (Callander, forest path, Loch Lomond)
It’s also a good pick for families or mixed groups as long as everyone is comfortable with a few shorter stops. If your style is slow travel and long walks every stop, you might end up wishing for more time in the woods or at the pier.
Should you book Stirling Castle & the Trossachs to Loch Lomond?
I’d book it if your goal is simple: see Stirling Castle, get a real Trossachs feel, and still finish with a proper Loch Lomond moment without spending your whole trip navigating logistics.
Skip the “maybe” if you’re okay with admission not being included and you can accept that some stops are brief by design. The payoff is a full day that feels like Scotland on a tight schedule—without making you feel like you’re sprinting from one place to the next.
If you’re traveling with a group that can fill the up to 6 seats, the price becomes much easier to justify. If you’re traveling solo or as a duo, compare against what admission + alternative transport would cost you, then decide based on how much you value a guided, driver-managed route.
FAQ
What time does the tour start?
The start time is 8:30 am.
How long is the tour?
It lasts approximately 6 to 8 hours.
Is pickup included?
Yes, pickup is offered.
Are tickets included for Stirling Castle and the other stops?
No. Admission tickets are not included for the listed stops, including Stirling Castle.
Is this tour private?
Yes. It’s a private tour/activity, and only your group participates (up to 6 people).
Can I cancel for a full refund?
Yes. You can cancel for a full refund up to 24 hours before the experience starts (free cancellation).